

1 Python解释器下载
1.1 安装环境
Windows 10 专业工作站版22H2
python-3.9.6-amd64.exe
1.2 下载地址
Python官网:https://www.python.org/
Python镜像:https://registry.npmmirror.com/binary.html?path=python/3.9.6/
2 Python解释器安装
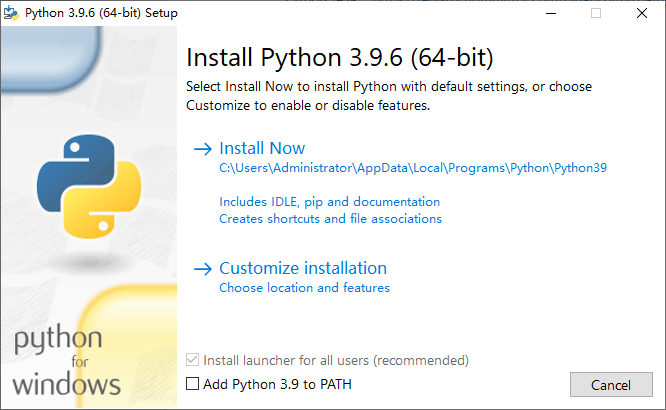
2.1 Install Python 3.9.6 (64-bit)界面
双击运行下载好的python-3.9.6-amd64.exe解释器包文件
![图片[1]-Win10操作系统安装Python-牛翰网](https://niuimg.niucores.com/wp-content/uploads/2024/08/341864583316660078.png)
单击Add Python 3.9 to PATH左边的复选框
![图片[2]-Win10操作系统安装Python-牛翰网](https://niuimg.niucores.com/wp-content/uploads/2024/08/2997417623367606345.png)
单击Customize installation进入Optional Features界面
2.2 Optional Features界面
![图片[3]-Win10操作系统安装Python-牛翰网](https://niuimg.niucores.com/wp-content/uploads/2024/08/781443143737375599.png)
单击Next按钮进入Advanced Options界面
2.3 Advanced Options界面
![图片[4]-Win10操作系统安装Python-牛翰网](https://niuimg.niucores.com/wp-content/uploads/2024/08/1430760165848015243.png)
单击Install for all users左边的复选框
![图片[5]-Win10操作系统安装Python-牛翰网](https://niuimg.niucores.com/wp-content/uploads/2024/08/5321966722637009775.png)
修改Customize install location下面的文本框为需要的安装路径
![图片[6]-Win10操作系统安装Python-牛翰网](https://niuimg.niucores.com/wp-content/uploads/2024/08/3155263240305888472.png)
单击Install按钮进入Set Progress界面
2.3 Set Progress界面
![图片[7]-Win10操作系统安装Python-牛翰网](https://niuimg.niucores.com/wp-content/uploads/2024/08/7112443092139928960.png)
等待该进度条跑满,之后会进入Setup was successful界面
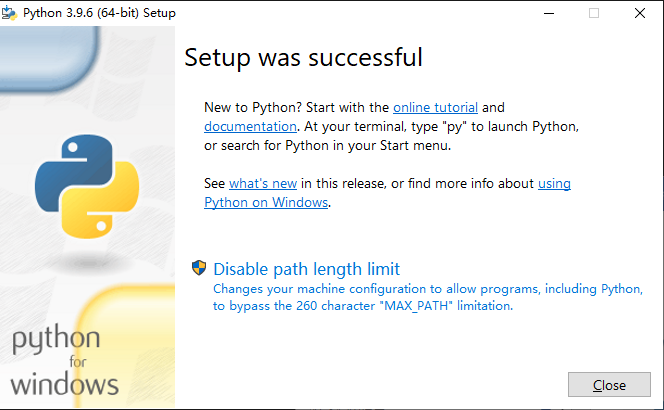
2.4 Setup was successful界面
出现以下界面证明python-3.9.6安装完成
3 Python解释器测试
快捷键win+r(键盘按住win键不放,单击字母r键)弹出运行框

3.1 cmd终端测试
输入cmd后单击回车键(Enter键)
![图片[8]-Win10操作系统安装Python-牛翰网](https://niuimg.niucores.com/wp-content/uploads/2024/08/3063635326406724338.png)
弹出cmd终端运行窗口
![图片[9]-Win10操作系统安装Python-牛翰网](https://niuimg.niucores.com/wp-content/uploads/2024/08/7688893996444007928.png)
输入python –version回车,出现以下内容证明python-3.9.6可以正常使用

如果仅安装python看到这里就可以躺平了,后面的操作选择查阅。
3.2 powershell终端测试
输入powershell后单击回车键(Enter键)
![图片[10]-Win10操作系统安装Python-牛翰网](https://niuimg.niucores.com/wp-content/uploads/2024/08/5500074993750226630.png)
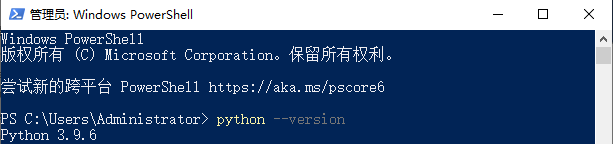
弹出powershell终端运行窗口
![图片[11]-Win10操作系统安装Python-牛翰网](https://niuimg.niucores.com/wp-content/uploads/2024/08/4382340476068982999.png)
输入python –version回车,出现以下内容证明python-3.9.6可以正常使用
4 Pip镜像源配置
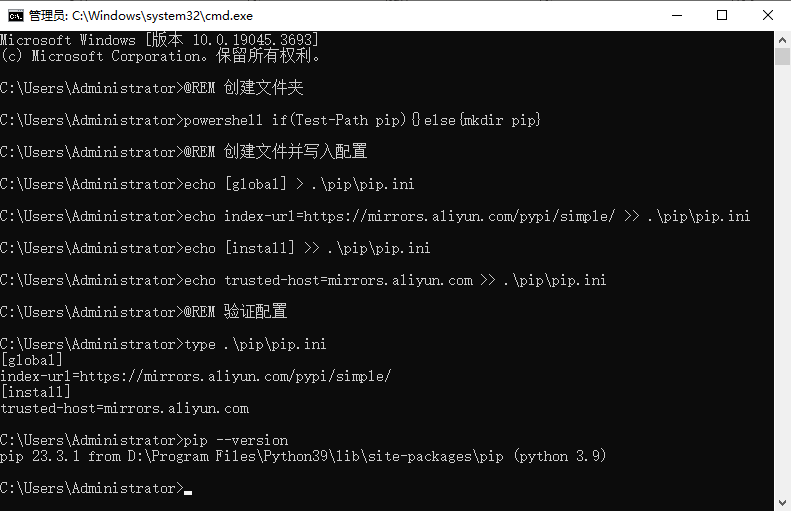
4.1 cmd终端配置
@REM 创建文件夹
powershell if(Test-Path pip){}else{mkdir pip}
@REM 创建文件并写入配置
echo [global] > .\pip\pip.ini
echo index-url=https://mirrors.aliyun.com/pypi/simple/ >> .\pip\pip.ini
echo [install] >> .\pip\pip.ini
echo trusted-host=mirrors.aliyun.com >> .\pip\pip.ini
@REM 验证配置
type .\pip\pip.ini
pip --version
5 Python虚拟环境搭建
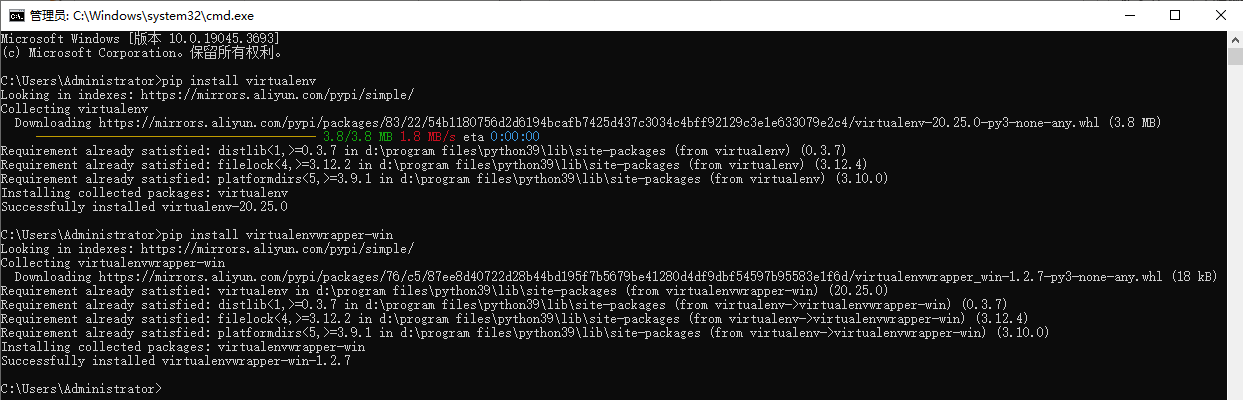
5.1 安装虚拟环境
@REM 安装虚拟环境
pip install virtualenv
pip install virtualenvwrapper-win
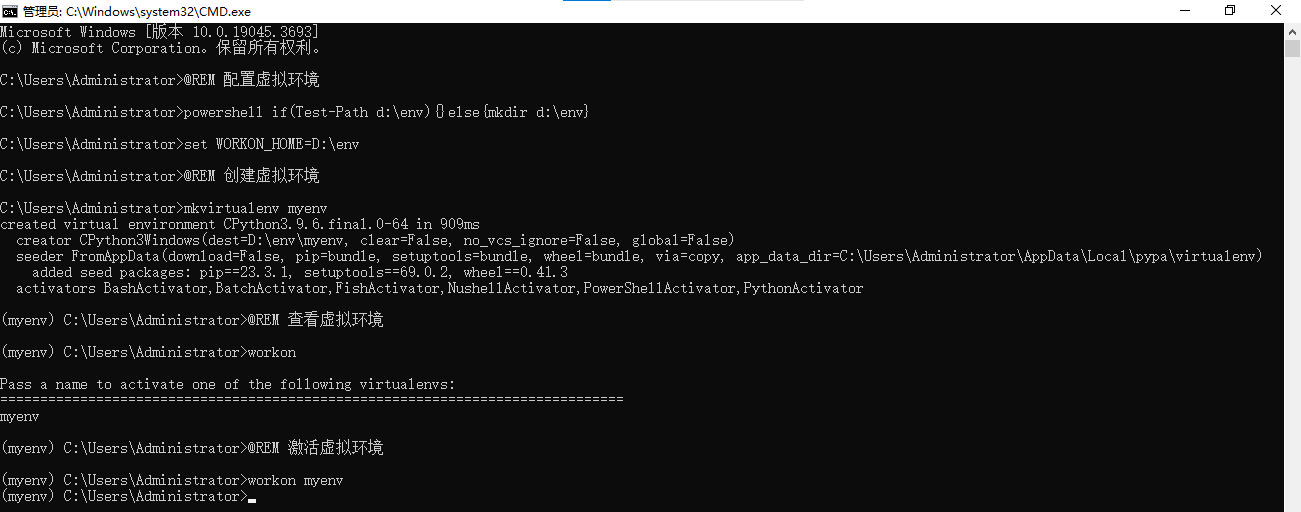
5.2 配置、创建、查看、激活虚拟环境
@REM 配置虚拟环境
powershell if(Test-Path d:\env){}else{mkdir d:\env}
set WORKON_HOME=D:\env
@REM 创建虚拟环境
mkvirtualenv myenv
deactivate
@REM 查看虚拟环境
workon
@REM 激活虚拟环境
workon myenv

5.3 退出、移除虚拟环境
@REM 退出虚拟环境
deactivate
@REM 移除虚拟环境
rmvirtualenv myenv
6 Jupyter-notebook环境配置
6.1 安装代码
@REM 安装jupyter-notebook
pip install ipython
pip install jupyter notebook
pip install jupyterlab-language-pack-zh-CN
pip install jupyter-contrib-nbextensions==0.2.0
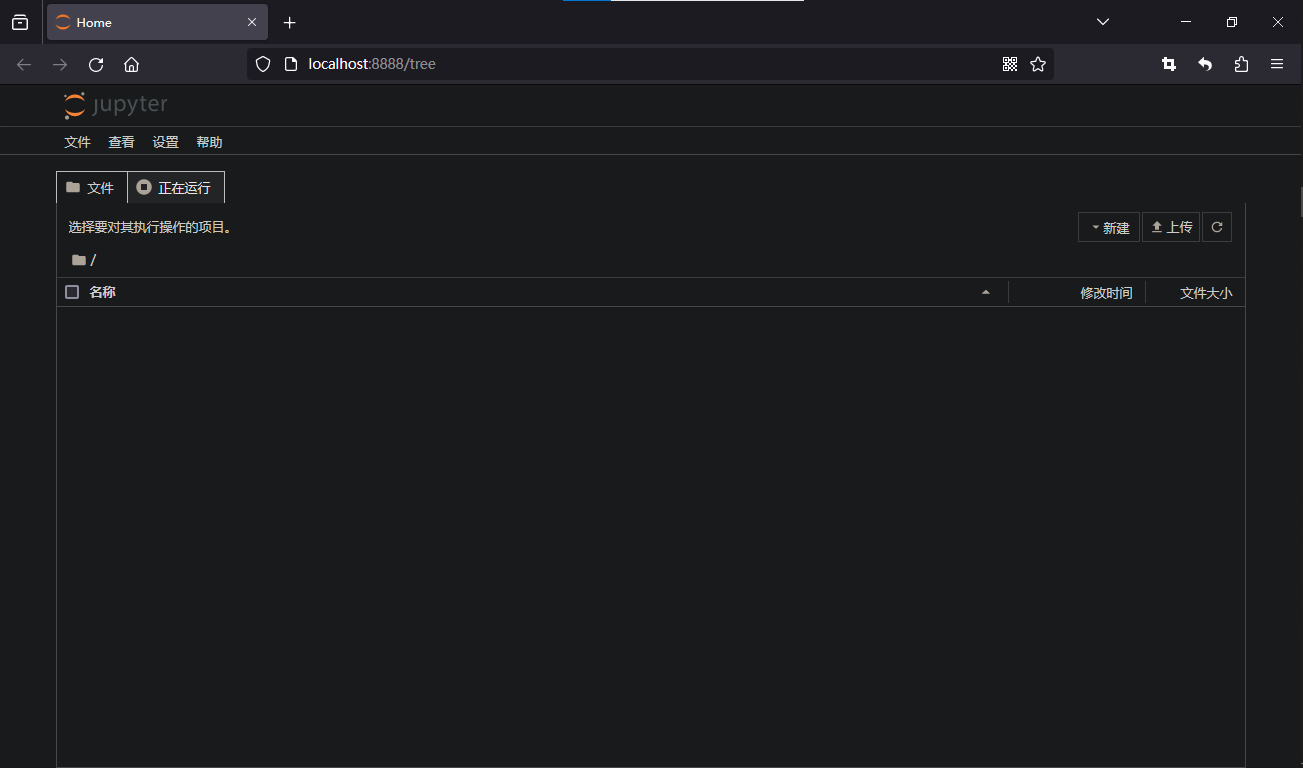
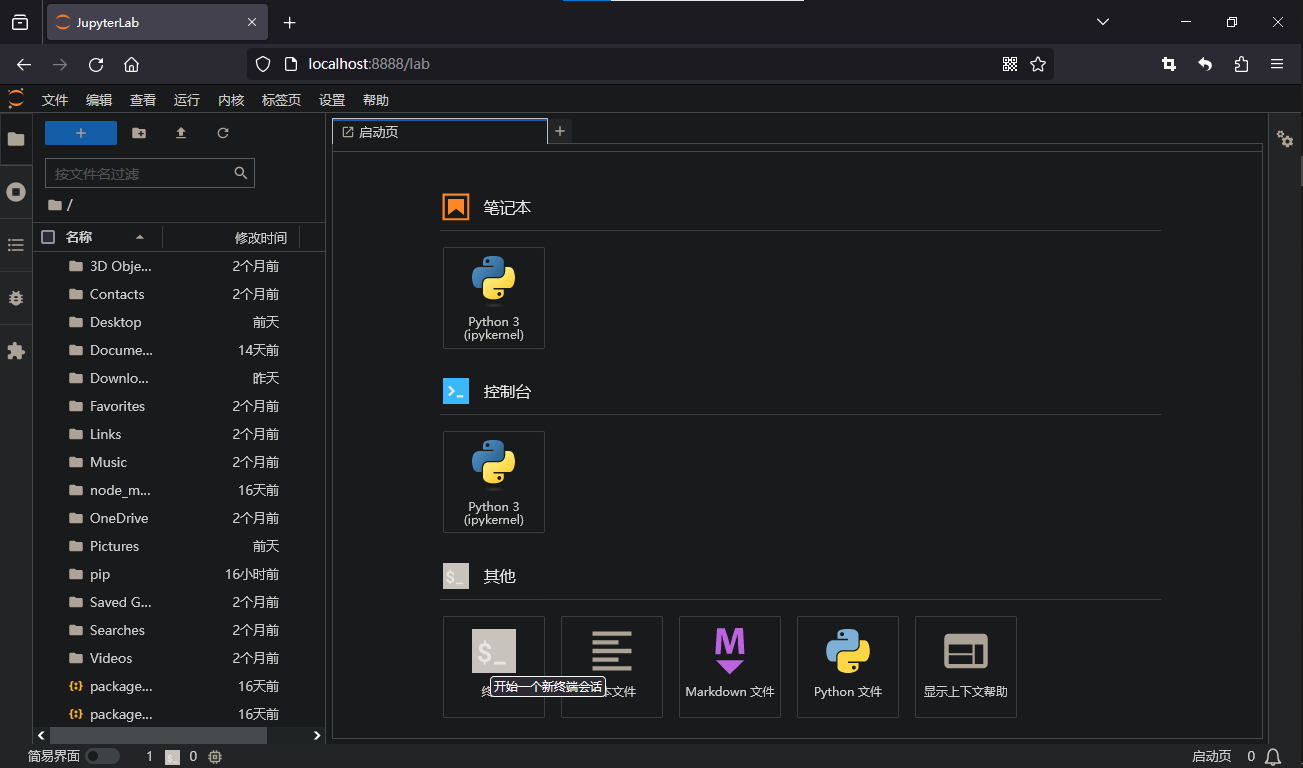
6.2 使用代码
@REM 启动jupyter-notebook
jupyter-notebook
@REM 访问jupyter-notebook
start http://localhost:8888/tree
start http://localhost:8888/lab
6.3 语言修改
![图片[12]-Win10操作系统安装Python-牛翰网](https://niuimg.niucores.com/wp-content/uploads/2024/08/8429652477881554459.png)
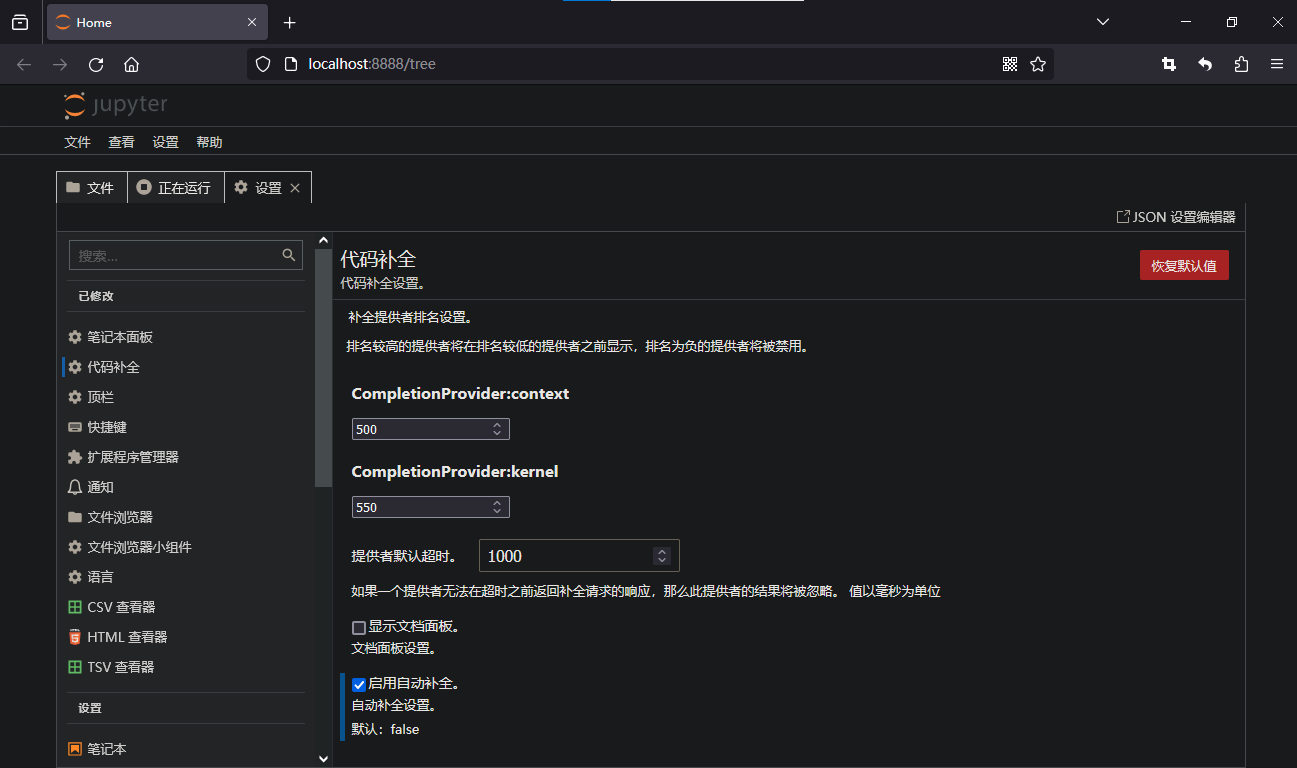
6.4 提示配置
![图片[13]-Win10操作系统安装Python-牛翰网](https://niuimg.niucores.com/wp-content/uploads/2024/08/2476876052363370223.png)
6.5 虚拟环境
cmd
workon
workon myenv

© 版权声明
本站所有资源来自于网络,仅供学习与参考,请勿用于商业用途,否则产生的一切后果将由您(转载者)自己承担!
如有侵犯您的版权,请及时联系3500663466#qq.com(#换@),我们将第一时间删除本站数据。
如有侵犯您的版权,请及时联系3500663466#qq.com(#换@),我们将第一时间删除本站数据。
THE END


暂无评论内容