


1. 安装 OpenAI 官方库(可选)
如果你使用 Node.js 环境,可以通过 npm 或 yarn 安装 OpenAI 的官方 SDK。这样你可以更方便地与 API 进行交互。
npm install openai
如果你在浏览器环境中使用 fetch 来调用 API,则不需要安装任何库。
2. 准备 API Key
和 Python 一样,你需要在 OpenAI 账户 中获取 API Key,并将其用于请求中。
3. 使用 JavaScript 调用 OpenAI API
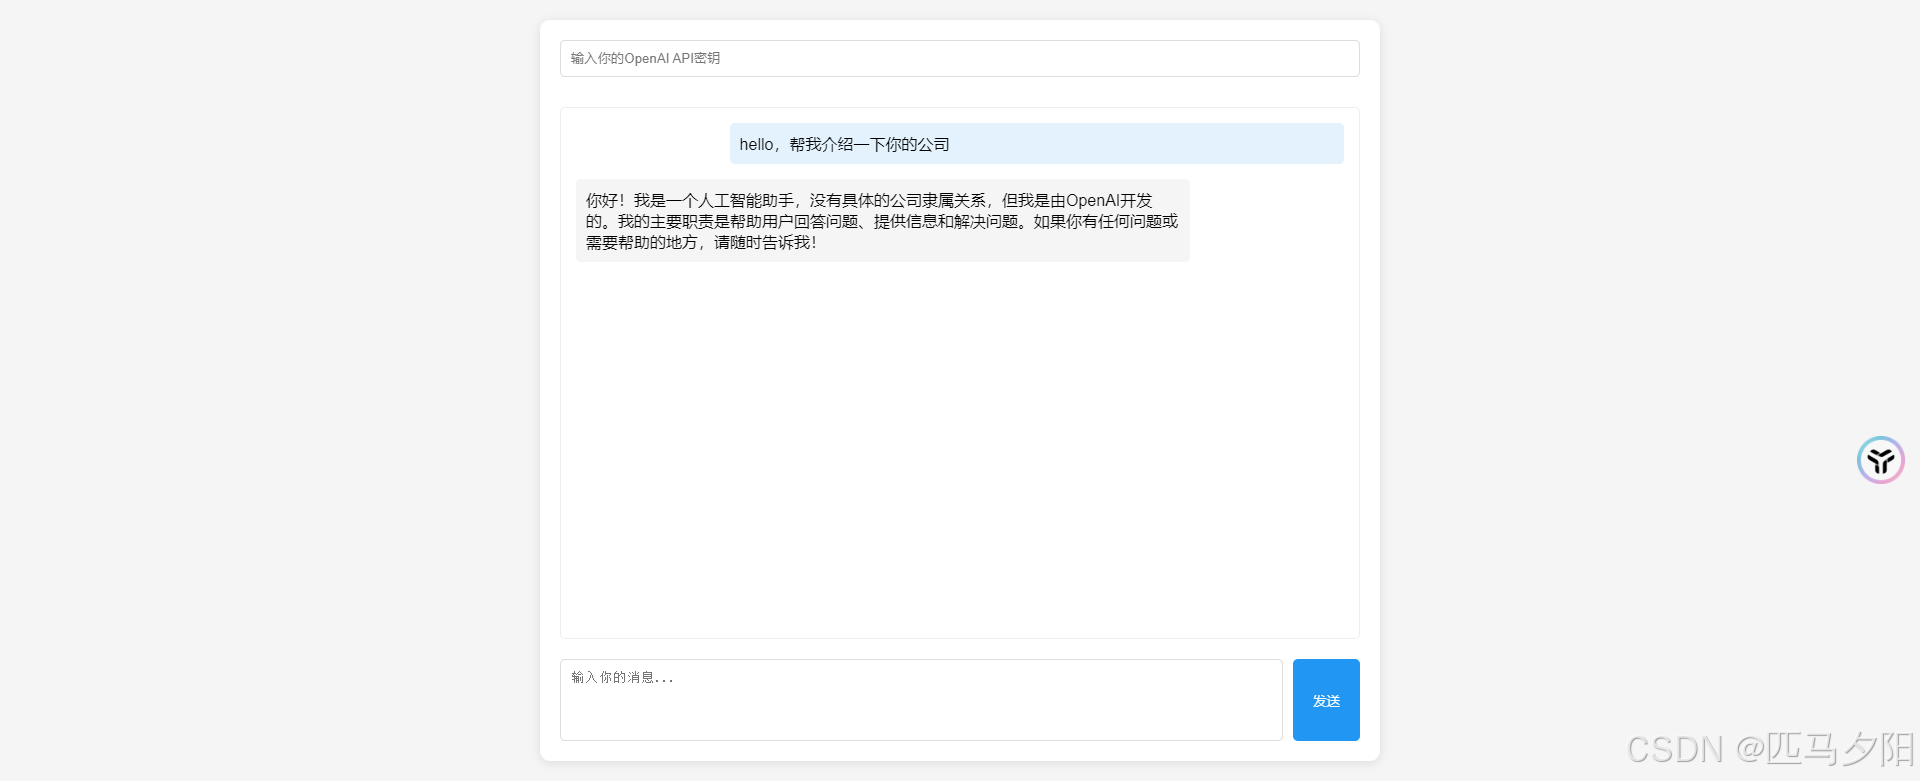
基本示例:使用 fetch 调用 ChatGPT API
代码示例(浏览器环境):
// 获取 OpenAI API Key(请确保此密钥安全)
const apiKey = 'your_openai_api_key';

// 请求的 API URL
const url = 'https://api.openai.com/v1/chat/completions';

// 定义请求体
const requestBody = {
  model: "gpt-3.5-turbo",  // 可以是 gpt-4 或其他模型
  messages: [
    { role: "system", content: "你是一个乐于助人的AI助手。" },
    { role: "user", content: "帮我写一个Python计算两个数之和的函数。" }
  ],
  temperature: 0.7,  // 控制生成内容的随机性,范围 0-1
  max_tokens: 150,   // 控制生成内容的最大长度
};

// 发送请求到 OpenAI API
fetch(url, {
  method: 'POST',
  headers: {
    'Content-Type': 'application/json',
    'Authorization': `Bearer ${apiKey}`,
  },
  body: JSON.stringify(requestBody),
})
  .then(response => response.json())
  .then(data => {
    console.log(data.choices[0].message.content);  // 输出生成的内容
  })
  .catch(error => {
    console.error('Error:', error);
  });
运行结果:
def add_numbers(a, b):
    return a + b
4. 高级使用场景:
场景 1:生成文本(例如文章、博客等)
代码示例:
const generateContent = async (userInput) => {
  const apiKey = 'your_openai_api_key';
  const url = 'https://api.openai.com/v1/chat/completions';

  const requestBody = {
    model: "gpt-4",  // 选择合适的模型
    messages: [
      { role: "system", content: "你是一名专业的文案编辑。" },
      { role: "user", content: userInput }
    ],
    temperature: 0.6,
    max_tokens: 200,
  };

  try {
    const response = await fetch(url, {
      method: 'POST',
      headers: {
        'Content-Type': 'application/json',
        'Authorization': `Bearer ${apiKey}`,
      },
      body: JSON.stringify(requestBody),
    });

    const data = await response.json();
    console.log(data.choices[0].message.content);  // 输出生成的文案
  } catch (error) {
    console.error('Error:', error);
  }
};

// 用户输入
generateContent("帮我写一段关于AI教育工具的产品介绍。");
场景 2:创建问答机器人
代码示例:
const chatbotResponse = async (userInput) => {
  const apiKey = 'your_openai_api_key';
  const url = 'https://api.openai.com/v1/chat/completions';

  const requestBody = {
    model: "gpt-3.5-turbo",  // 使用 ChatGPT 模型
    messages: [
      { role: "system", content: "你是一个智能问答机器人,可以回答各种问题。" },
      { role: "user", content: userInput }
    ],
    temperature: 0.7,
    max_tokens: 150,
  };

  try {
    const response = await fetch(url, {
      method: 'POST',
      headers: {
        'Content-Type': 'application/json',
        'Authorization': `Bearer ${apiKey}`,
      },
      body: JSON.stringify(requestBody),
    });

    const data = await response.json();
    return data.choices[0].message.content;  // 返回生成的回复
  } catch (error) {
    console.error('Error:', error);
    return "发生错误,请稍后再试。";
  }
};

// 用户输入
const userQuery = "如何用Python读取JSON文件?";
chatbotResponse(userQuery).then(response => {
  console.log(response);  // 输出问答机器人回复
});
场景 3:批量处理多个请求
代码示例:
const batchProcess = async (texts) => {
  const apiKey = 'your_openai_api_key';
  const url = 'https://api.openai.com/v1/chat/completions';

  const responses = [];
  for (const text of texts) {
    const requestBody = {
      model: "gpt-3.5-turbo",
      messages: [
        { role: "user", content: text }
      ],
      temperature: 0.6,
      max_tokens: 100,
    };

    try {
      const response = await fetch(url, {
        method: 'POST',
        headers: {
          'Content-Type': 'application/json',
          'Authorization': `Bearer ${apiKey}`,
        },
        body: JSON.stringify(requestBody),
      });

      const data = await response.json();
      responses.push(data.choices[0].message.content);
    } catch (error) {
      console.error('Error:', error);
      responses.push('错误:无法生成回复');
    }
  }

  return responses;
};

// 批量处理文本
const texts = [
  "帮我总结这段话的重点:Python是一种非常流行的编程语言。",
  "帮我翻译这句话:Hello, how are you?",
  "生成一句关于人工智能未来发展的预测。"
];

batchProcess(texts).then(responses => {
  console.log(responses.join('\n'));
});
5. 运行时优化和注意事项:
-
API 限制和错误处理:
- 在高频请求的情况下,确保处理
429 Too Many Requests错误。 - 可以实现重试机制,例如在遇到限流错误时延时一段时间后再发起请求。
- 在高频请求的情况下,确保处理
-
API Key 安全:
- 切勿在前端代码中暴露 API Key,尤其是公开的前端应用。
- 推荐使用环境变量或服务器代理来隐藏 API Key。
-
费用控制:
- OpenAI 的 API 按照生成的
tokens(字符数量)进行计费。根据max_tokens来控制生成的文本长度,避免产生不必要的费用。
- OpenAI 的 API 按照生成的
-
API 调用频率:
- 如果在短时间内发送大量请求,可以通过添加适当的
delay或debounce来避免频繁调用。
- 如果在短时间内发送大量请求,可以通过添加适当的
通过以上示例,你可以在 JavaScript 环境中灵活调用 OpenAI API 来完成多种任务
到此这篇关于在JavaScript中调用OpenAI API的详细步骤的文章就介绍到这了,更多相关JavaScript调用OpenAI API内容请搜索脚本之家以前的文章或继续浏览下面的相关文章希望大家以后多多支持脚本之家!
来源链接:https://www.jb51.net/javascript/3387880iu.htm
© 版权声明
本站所有资源来自于网络,仅供学习与参考,请勿用于商业用途,否则产生的一切后果将由您(转载者)自己承担!
如有侵犯您的版权,请及时联系3500663466#qq.com(#换@),我们将第一时间删除本站数据。
如有侵犯您的版权,请及时联系3500663466#qq.com(#换@),我们将第一时间删除本站数据。
THE END


暂无评论内容