


demo源码运行环境以及配置
- 运行环境:依赖Node安装环境,demo本地Node版本:14.19.1。
- 运行工具:vscode或者其他工具。
- 配置方式:下载demo源码,vscode打开,然后顺序执行以下命令:
(1)下载demo环境依赖包命令:npm i
(2)启动Node后端接口命令:node nodeServer.js
(3)打包demo命令: npm run build
(4)直接打开index.html页面即可浏览
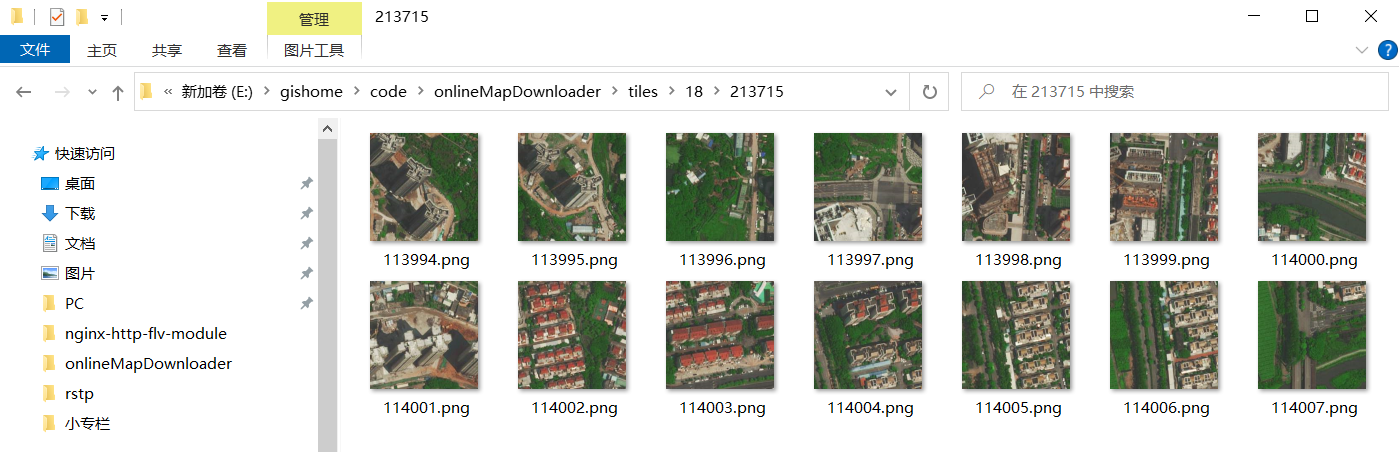
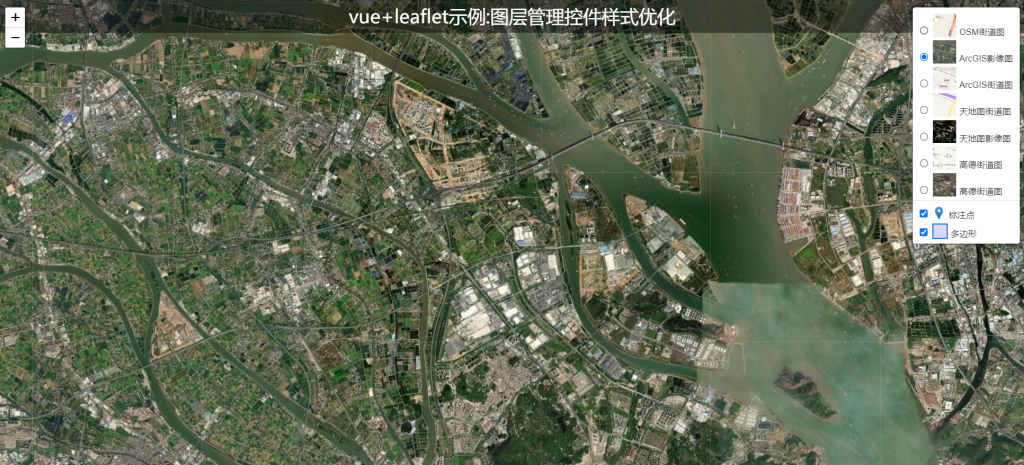
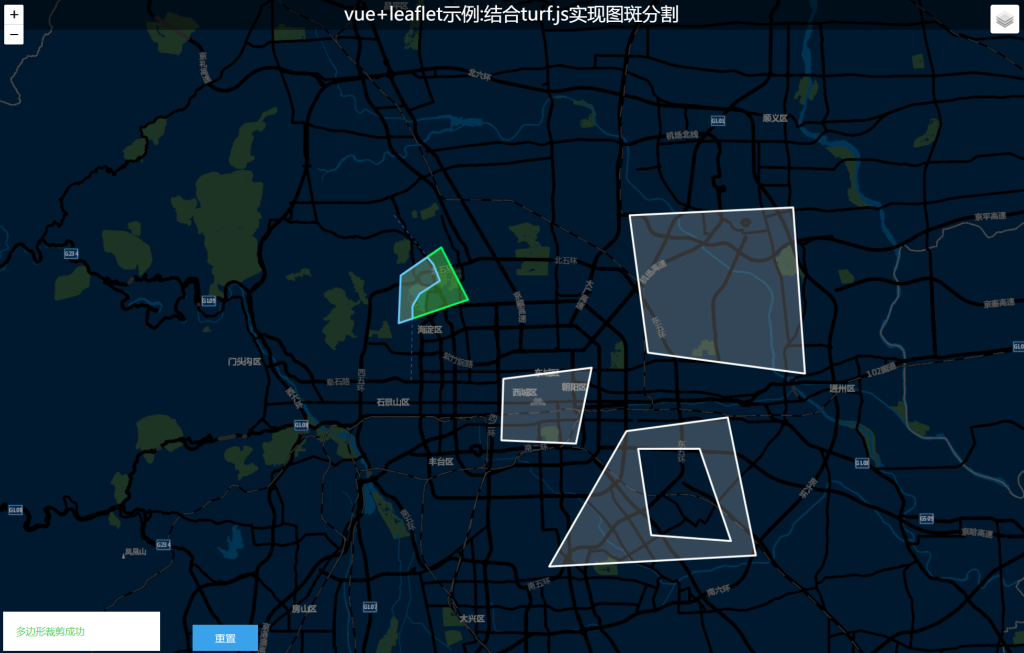
示例效果
![图片[1]-leaflet框选范围下载地图离线瓦片:以高德地图为例(附源码下载)-牛翰网](https://niuimg.niucores.com/wp-content/uploads/2025/05/7318845171061102076.png)
![图片[2]-leaflet框选范围下载地图离线瓦片:以高德地图为例(附源码下载)-牛翰网](https://niuimg.niucores.com/wp-content/uploads/2025/05/7764889309842093741.png)
- 前端核心源码
import L from "leaflet";
import "@geoman-io/leaflet-geoman-free";
import "leaflet.vectorgrid"; //引用矢量瓦片插件
let TileLnglatTransform = require("tile-lnglat-transform"); //  用于经纬度转换为瓦片坐标
let x1, y1, x2, y2;
// 根据地图平台使用转换类
let TileLnglatTransformGaode = TileLnglatTransform.TileLnglatTransformGaode;
let tileALL = []; // 保存所有层级瓦片坐标等信息
const httpRequest = "http://localhost:8888";
const api = `${httpRequest}/api/downloadMap`;
initMap();
function initMap() {
  const map = L.map("map", {
    attributionControl: false,
  }).setView([23.56, 113.23], 14);
  L.tileLayer(
     "http://webst0{s}.is.autonavi.com/appmaptile?style=6&x={x}&y={y}&z={z}",
     { subdomains: ["1", "2", "3", "4"], crossOrigin: true }
  ).addTo(map);
  map.pm.addControls({
    position: "topleft",
    drawMarker: false,
    drawCircleMarker: false,
    drawPolyline: false,
    drawRectangle: true,
    drawPolygon: false,
    drawCircle: false,
    drawText: false,
    editMode: false,
    dragMode: false,
    cutPolygon: false,
    removalMode: true,
    rotateMode: false,
  });
  map.pm.setLang("zh");
  map.on("pm:create", (e) => {
    // console.log(e);
    // 左下角
    const southWest = e.layer._bounds._southWest;
    // 右上角
    const northEast = e.layer._bounds._northEast;
    (x1 = southWest.lng), (y1 = northEast.lat); // 起始点坐标(左上角)
    (x2 = northEast.lng), (y2 = southWest.lat); // 终点坐标(右下角)
    tileALL = [];
    const minzoom = Number($("#minZoom").val());
    const maxzoom = Number($("#maxZoom").val());
    for (let i = minzoom; i <= maxzoom; i++) {
      tileALL[i] = {};
      let p1 = TileLnglatTransformGaode.lnglatToTile(x1, y1, i);
      let p2 = TileLnglatTransformGaode.lnglatToTile(x2, y2, i);
      tileALL[i].t = i; // 层级
      tileALL[i].x = [p1.tileX, p2.tileX]; // 瓦片横坐标范围(左至右)
      // tileALL[i].y = [p2.tileY, p1.tileY]; // 瓦片纵坐标范围(下至上)
      tileALL[i].y = [p1.tileY, p2.tileY]; // 瓦片纵坐标范围(下至上)
    }
    // console.log("tileALL:",tileALL);
  });
  $("#downloadMap_Btn").click(function () {
    if (tileALL.length === 0) return;
    const minzoom = Number($("#minZoom").val());
    const maxzoom = Number($("#maxZoom").val());
    $.ajax({
      type: "POST",
      url: api,
      data: {
        tileALL: tileALL,
        minzoom: minzoom,
        maxzoom: maxzoom,
      },
      success: function (res) {
        console.log("res", res);
      },
      error: function (e) {
        console.error("请求接口失败:", e);
      },
    });
  });
}
- 后端核心源码
// 1.引入框架
// node项目采用 common.js,不能采用 import 引入,只能用 require 方式
const express = require("express");
let request = require("request"); // 用于请求瓦片地图
let bagpipe = require("bagpipe"); //  用于异步请求数量控制
// 引入fs文件读写模块
const fs = require("fs");
const os = require("os");
const cors = require("cors");

let bag = new bagpipe(100, { timeout: 2000 }); //限制请求数,此处为100,可根据网络情况修改
let mapPath = "./tiles"; // 瓦片目录


// 服务端口
const port = 8888;
// 2.创建应用
const app = express();
app.use(express.urlencoded());
// 3.创建路由规则
// get请求
// 下载范围内离线地图瓦片接口
app.post("/api/downloadMap", (req, response) => {
  downloadMap(req, response);
});
//放开所有跨域
app.use(cors());
// 4.监听端口启动服务
app.listen(port, () => {
  console.log("server is running at: http://localhost:" + port);
  console.log("server start on: http://" + getIPv4() + ":" + port);
});
……
下载源码:GIS之家的学习交流圈
来源链接:https://www.cnblogs.com/giserhome/p/18791084
© 版权声明
本站所有资源来自于网络,仅供学习与参考,请勿用于商业用途,否则产生的一切后果将由您(转载者)自己承担!
如有侵犯您的版权,请及时联系3500663466#qq.com(#换@),我们将第一时间删除本站数据。
如有侵犯您的版权,请及时联系3500663466#qq.com(#换@),我们将第一时间删除本站数据。
THE END


暂无评论内容